In this tutorial we show you a door application but with a different technique, using film strips. We will use our Magnum Primer as an adhesion promoter in difficult spots.
APPLICATION PROCEDURE
Door lining
LEVEL
Medium
APPLICATION TOOLS
Spatula
Cutter
Heat gun or hairdryer
Magnum Primer
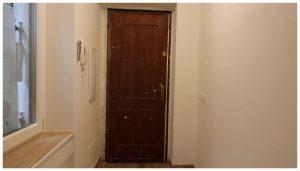
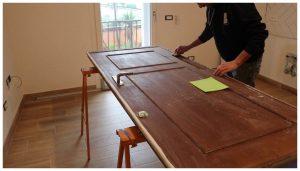
We want to renew this old door: it is an oversized door, instead of replacing it it was cheaper to cover it.
This door has frames on the inside of the face and also on the outside edge.
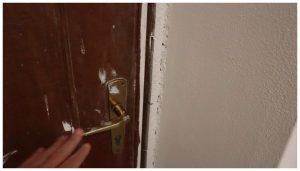
Let’s take the door apart. We will remove the top lock and the handle.
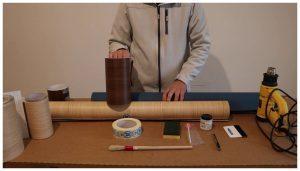
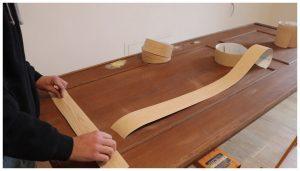
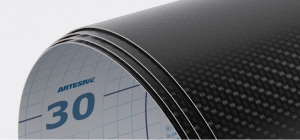
Here’s what we need: a light wood effect film (WD-044), an adhesion promoter (Magnum Primer) and as usual a heat gun, a spatula and a cutter.
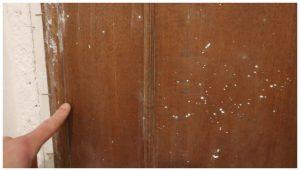
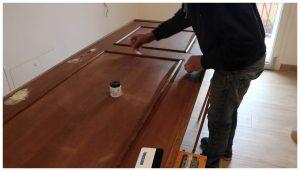
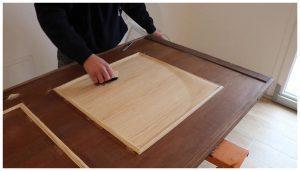
The first thing to do is to clean the door. It is necessary to remove every single imperfection and impurities present on the surface.
We fill the parts that do not interest us, in our case the upper lock. The grout must be allowed to dry, then we will have to sand the area, in order to obtain a smooth and homogeneous surface for the subsequent application.
In this case, instead of using a single vinyl as wide as the whole door, we decided to cut strips to apply on each segment of the frames and on the facade. This type of application is easier and leads to a better result, especially if the film used has a texture.
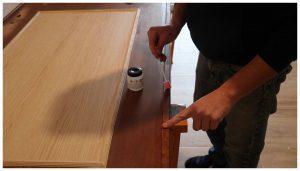
First, however, with our soaked pad we go to pass the primer on the points of greatest tension, in this case the frames.
We should wait about 5 minutes for it to dry completely. When wet it does not have the same adhesion power.
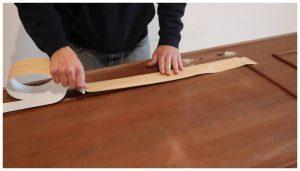
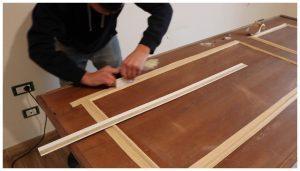
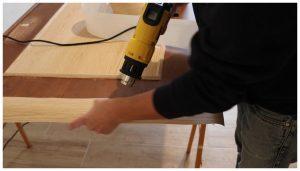
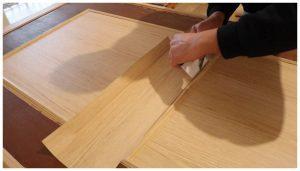
We position the strips in the center of the frame, and by heating them with the heat gun or a hairdryer, we go to apply them along all the grooves, with the help of the spatula.
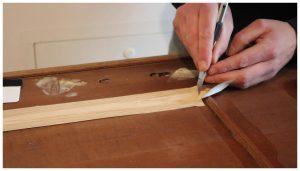
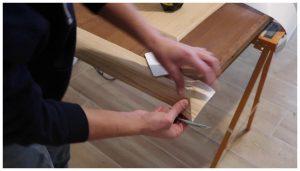
Once the first strip has been applied, we are going to trim and cut along the edge.
Using our cutter, we are going to engrave the film NOT exactly on the corner, at 45 °, but we will leave some abundance to guarantee the subsequent overlap.
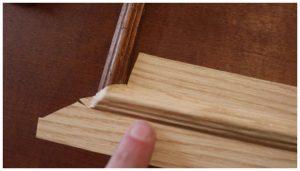
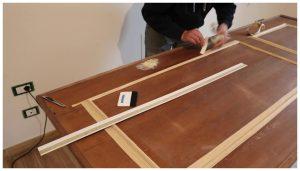
Let’s now move on to apply the next strip. As before, we heat the film with the heat gun or the hairdryer, we go to shape along the grooves and, once applied, with the cutter we engrave in this case perfectly at 45 °. This film will surmount the abundant piece of the previous one.
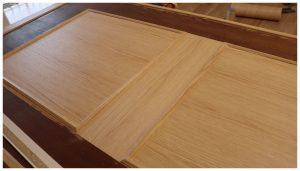
Here is the final result of the angle. It is better noticeable that the film we applied previously remains below, the one just applied remains above, cut at 45 °. Everything else is film in abundance which we will then remove.
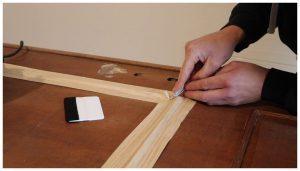
We proceed in the same way for all the frames, using the same technique. This is the provisional result of the interior frames:
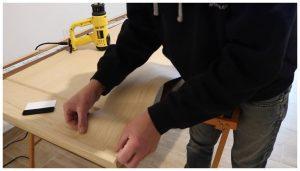
Let’s move on to cutting and removing the excess film. We can use our spatula as a thickness when cutting, in this way we will create a margin that we will need for the overlap of the central part.
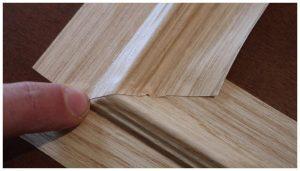
Proceeding calmly, we remove the excess film.
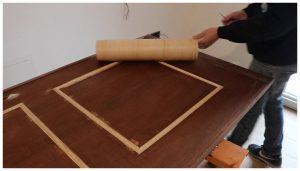
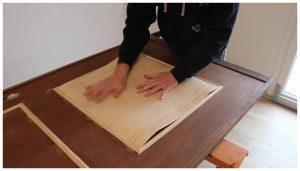
Let’s proceed with the application of the boss, or part inside the frame.
In this case we used 60cm film and cut it perfectly to size.
Once the application on the central parts is complete, we will use the primer on the frame on the outer edge again. We repeat the same procedure for the entire perimeter.
Now let’s proceed with applying the rest of the face, always using the striping technique.
When we cut the sides of this central band, it is better to leave a couple of millimeters of abundance, so that we can make a small overlap with the side bands.
We complete the application on the missing parts.
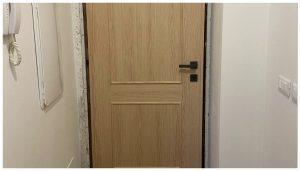
This is the result of the facade (including the frames and the new handle):
To take advantage of promotions and exclusive offers! By subscribing you agree to our Terms, Privacy & Cookies Policy.
We use cookies on our website to give you the most relevant experience by remembering your preferences and repeat visits. By clicking “Accept”, you consent to the use of ALL the cookies. Read moreOKCOOKIE SETTINGSREFUSE
Cookies Policy
Privacy overview
This website uses cookies to improve your experience while browsing the website. Of these cookies, cookies that are categorized as necessary are stored on your browser as they are essential for the basic functionality of the website to work. We also use cookies to third parties that help us analyze and understand how you use this website. These cookies will be stored in your browser only with your consent. You also have the option to disable these cookies. But disabling some of these cookies could have an effect on your browsing experience.
These cookies are essential to allow the user to move around the site and use the requested services, such as access to protected areas of the site.
Essential cookies are first party cookies and can be permanent or temporary. We use this type of cookie to manage the registration and access phase by users. Without these cookies the user would not be able to access the requested services and our sites would not function properly.
Cookie
Duration
Description
viewed_cookie_policy
The cookie is set by the GDPR Cookie Consent plugin to store whether or not the user has consented to the use of cookies. It does not store any personal data.
_GRECAPTCHA
This cookie is set by the Google recaptcha service to identify bots to protect the website against malicious spam attacks.
__stripe_mid
Stripe sets this cookie cookie to process payments.
__stripe_sid
Stripe sets this cookie cookie to process payments.
Advertisement cookies are used to provide visitors with relevant ads and marketing campaigns. These cookies track visitors across websites and collect information to provide customized ads.
Cookie
Duration
Description
test_cookie
The test_cookie is set by doubleclick.net and is used to determine if the user's browser supports cookies.
VISITOR_INFO1_LIVE
A cookie set by YouTube to measure bandwidth that determines whether the user gets the new or old player interface.
YSC
YSC cookie is set by Youtube and is used to track the views of embedded videos on Youtube pages.
yt-remote-connected-devices
YouTube sets this cookie to store the video preferences of the user using embedded YouTube video.
yt-remote-device-id
YouTube sets this cookie to store the user's video preferences using the embedded YouTube video.
yt.innertube::nextId
This cookie, set by YouTube, records a unique ID to store data on which YouTube videos the user has seen.
yt.innertube::requests
This cookie, set by YouTube, registers a unique ID to store data on what videos from YouTube the user has seen.
Analytical cookies are used to understand how visitors interact with the website. These cookies help provide information on visitor numbers, bounce rate, traffic source, etc.
Cookie
Duration
Description
CONSENT
YouTube sets this cookie via embedded YouTube videos and records anonymous statistical data.
_ga
The _ga cookie, installed by Google Analytics, calculates visitor, session and campaign data and also tracks site usage for the site analysis report. The cookie stores information anonymously and assigns a randomly generated number to recognize unique visitors.
_gat_UA-4724697-18
A variant of the _gat cookie set by Google Analytics and Google Tag Manager to allow website owners to track visitor behavior and measure site performance. The template element in the name contains the unique identity number of the account or website it refers to.
_gcl_au
Provided by Google Tag Manager to test the advertising efficiency of websites using their services.
_gid
Installed by Google Analytics, the _gid cookie stores information about how visitors use a website, also creating an analytical report of the website's performance. Some of the data that is collected includes the number of visitors, their origin and the pages they visit. anonymously.
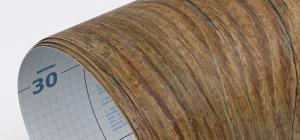 Wood Effect Vinyl Films
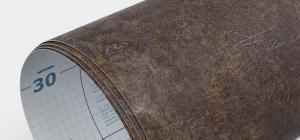 Stone Effect Vinyl Films
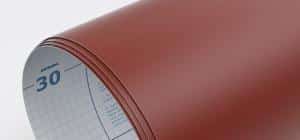 Solid Colours Vinyl Films
 Window Films
 Modern Vinyl Films
 Specials Films