In this tutorial we will refurbish a simple table on which the film was already applied.
APPLICATION PROCEDURE
Flat surface
LEVEL
Easy
APPLICATION TOOLS
Cutter
Solution of water and alcohol
Spatula
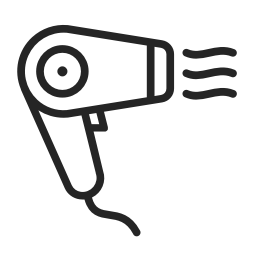
Heat gun or hairdryer
In this tutorial we will show you how to change the look of a table with Artesive adhesive films.
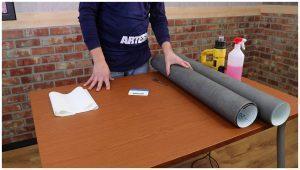
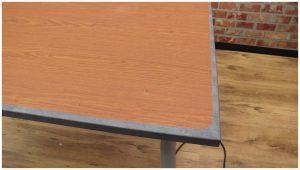
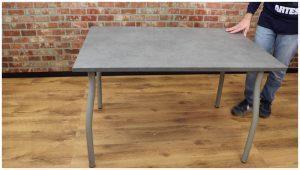
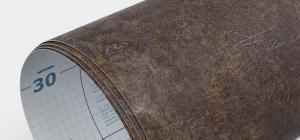
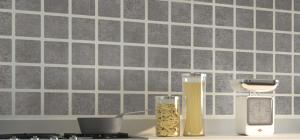
We have a table that has already been renovated 5 years ago with a cherry film. Today we want to make it a little more modern by using ST-015 dark concrete effect film.
We will cover both the top and the bottom.
We are not going to remove the old vinyl, but we will apply the new film directly on top. This is the fastest solution and, having previously applied the film, the surface is already flat and smooth.
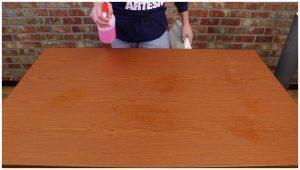
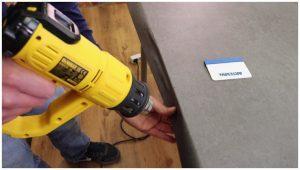
Let’s start cleaning the table.
Since we will apply the film over an existing one, the adhesion power will be very high. If we make a mistake it will be difficult to move the film and the probability of creating air bubbles will increase.
We therefore moisten the surface with the same aqueous alcohol-based solution. Don’t worry if some spots remain wetter than others, all excess water will then be removed.
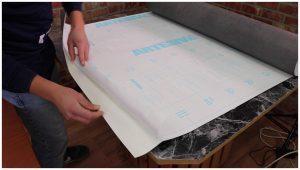
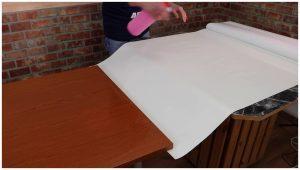
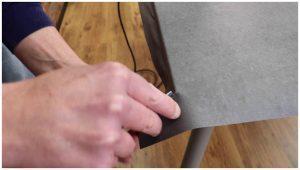
In this case I am alone, so I have prepared another table to help me with the application. We turn the film on the other table and remove the back paper for about 10 cm.
We place this side of film on the edge of the table leaving about 5 cm of margin.
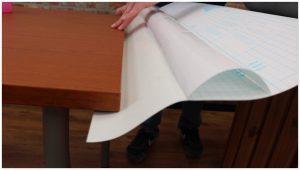
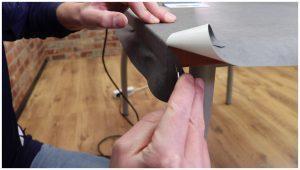
Once this is done we will completely remove the back paper from the vinyl. Then we also slightly moisten the adhesive part of the film, being careful not to wet the back paper. Then, with a single gesture, we go to place all the film directly on the table.
With the wet surface we can try to reposition the film if we fail on the first attempt.
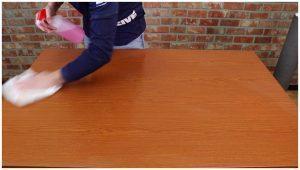
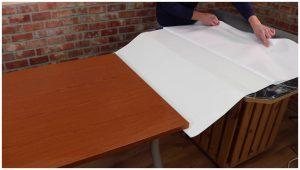
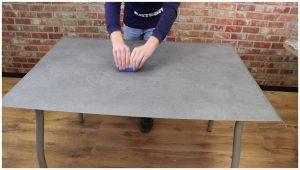
From the central point we will begin to remove excess water with the help of the spatula.
You will see at the end of the video that this technique will reduce the risk of any air bubbles forming.
After the application on the upper part we will have to make the edges. But having moistened the surface we find ourselves having the final part not perfectly dry. In this case we will have to wait for complete drying before proceeding. That’s why we chose the alcohol-based solution: alcohol dries faster than soapy water and allows us to finish the job faster.
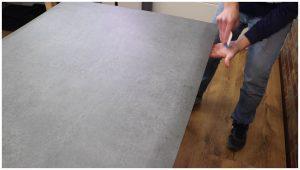
We use the heat gun to shape the edges. We stretch the sides starting from the center.
Once at the corner we proceed with the classic application with the 45 ° cut that you find in numerous other tutorials.
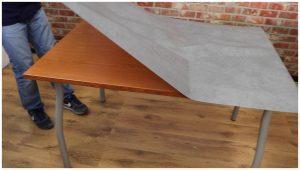
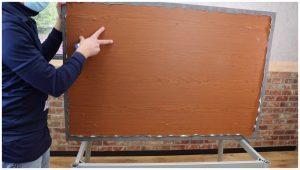
Once finished, we turn the top to cover the lower surface as well. We remove the excess margin, cutting along the entire perimeter. Then we peel off the excess film.
Question: do I have to cover the bottom?
Well, if you left a good margin, say about 5-10cm, then that wouldn’t be necessary. Consider that it is a table, the part remains hidden. However, we recommend that you always do this, in order to fix the edges and ensure excellent durability over time.
We use the alcohol-based solution again to moisten the surface. In this way we will have the possibility to reposition the film if we can not apply it immediately perfectly.
Once finished we can reassemble the table.
Here is the final result, we got a more modern table.
To take advantage of promotions and exclusive offers! By subscribing you agree to our Terms, Privacy & Cookies Policy.
We use cookies on our website to give you the most relevant experience by remembering your preferences and repeat visits. By clicking “Accept”, you consent to the use of ALL the cookies. Read moreOKCOOKIE SETTINGSREFUSE
Cookies Policy
Privacy overview
This website uses cookies to improve your experience while browsing the website. Of these cookies, cookies that are categorized as necessary are stored on your browser as they are essential for the basic functionality of the website to work. We also use cookies to third parties that help us analyze and understand how you use this website. These cookies will be stored in your browser only with your consent. You also have the option to disable these cookies. But disabling some of these cookies could have an effect on your browsing experience.
These cookies are essential to allow the user to move around the site and use the requested services, such as access to protected areas of the site.
Essential cookies are first party cookies and can be permanent or temporary. We use this type of cookie to manage the registration and access phase by users. Without these cookies the user would not be able to access the requested services and our sites would not function properly.
Cookie
Duration
Description
viewed_cookie_policy
The cookie is set by the GDPR Cookie Consent plugin to store whether or not the user has consented to the use of cookies. It does not store any personal data.
_GRECAPTCHA
This cookie is set by the Google recaptcha service to identify bots to protect the website against malicious spam attacks.
__stripe_mid
Stripe sets this cookie cookie to process payments.
__stripe_sid
Stripe sets this cookie cookie to process payments.
Advertisement cookies are used to provide visitors with relevant ads and marketing campaigns. These cookies track visitors across websites and collect information to provide customized ads.
Cookie
Duration
Description
test_cookie
The test_cookie is set by doubleclick.net and is used to determine if the user's browser supports cookies.
VISITOR_INFO1_LIVE
A cookie set by YouTube to measure bandwidth that determines whether the user gets the new or old player interface.
YSC
YSC cookie is set by Youtube and is used to track the views of embedded videos on Youtube pages.
yt-remote-connected-devices
YouTube sets this cookie to store the video preferences of the user using embedded YouTube video.
yt-remote-device-id
YouTube sets this cookie to store the user's video preferences using the embedded YouTube video.
yt.innertube::nextId
This cookie, set by YouTube, records a unique ID to store data on which YouTube videos the user has seen.
yt.innertube::requests
This cookie, set by YouTube, registers a unique ID to store data on what videos from YouTube the user has seen.
Analytical cookies are used to understand how visitors interact with the website. These cookies help provide information on visitor numbers, bounce rate, traffic source, etc.
Cookie
Duration
Description
CONSENT
YouTube sets this cookie via embedded YouTube videos and records anonymous statistical data.
_ga
The _ga cookie, installed by Google Analytics, calculates visitor, session and campaign data and also tracks site usage for the site analysis report. The cookie stores information anonymously and assigns a randomly generated number to recognize unique visitors.
_gat_UA-4724697-18
A variant of the _gat cookie set by Google Analytics and Google Tag Manager to allow website owners to track visitor behavior and measure site performance. The template element in the name contains the unique identity number of the account or website it refers to.
_gcl_au
Provided by Google Tag Manager to test the advertising efficiency of websites using their services.
_gid
Installed by Google Analytics, the _gid cookie stores information about how visitors use a website, also creating an analytical report of the website's performance. Some of the data that is collected includes the number of visitors, their origin and the pages they visit. anonymously.
 Wood Effect Vinyl Films
 Stone Effect Vinyl Films
 Solid Colours Vinyl Films
 Window Films
 Modern Vinyl Films
 Specials Films