Many customers are wondering how to apply film to kitchen tiles. In this tutorial we will show 3 solutions so that you can choose the one that best suits your needs.
APPLICATION PROCEDURE
Flat surface with texture
LEVEL
Easy / Medium
APPLICATION TOOLS
Cutter
Spatula
Sand paper
Spray with water or neutral detergent
Panno per pulizia
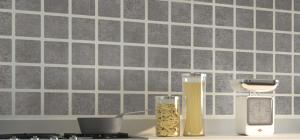
Let’s use an example fake wall. In a real kitchen, of course, we would have taken the wall units apart.
We use 3 different solutions:
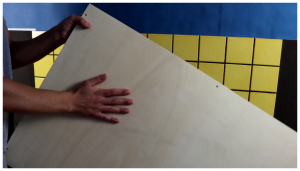
SOLUTION 1: application on panel
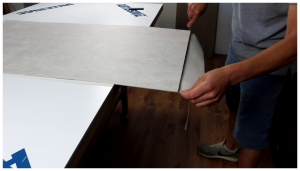
We chose a birch slab with a thickness of a few millimeters. We carry out a simple film application on it.
We cut out the edges with the cutter.
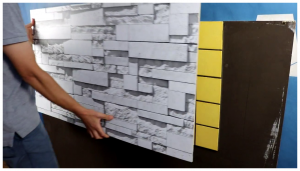
Then we fix the panel with screws on the tile wall.
This solution allows you to easily remove the panel and, why not, maybe use another pattern on the other side to have an always new environment.
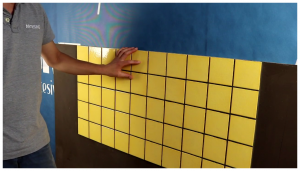
SOLUTION 2: direct application
This solution is recommended if the joints between the tiles are not too wide. In this case we notice the effect on the film.
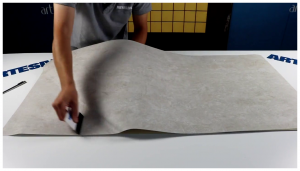
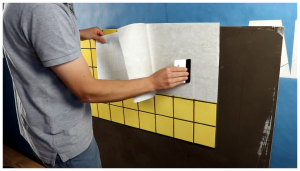
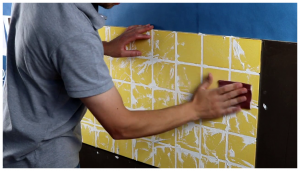
SOLUTION 3: fill the joints
We prepare the grout and fill the joints between the tiles with the help of a spatula.
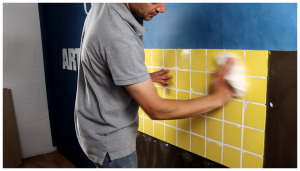
With the fine sandpaper we remove the excess putty once dried.
We then proceed to complete cleaning with a damp cloth.
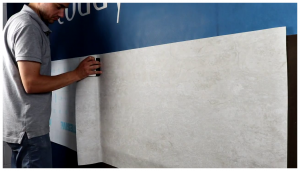
Once finished we apply the film directly.
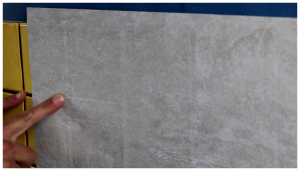
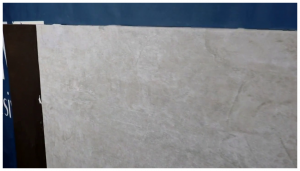
Let’s finish the edges. As you can see the surface is completely smooth in this case, the underlying joints cannot be seen.
To take advantage of promotions and exclusive offers! By subscribing you agree to our Terms, Privacy & Cookies Policy.
We use cookies on our website to give you the most relevant experience by remembering your preferences and repeat visits. By clicking “Accept”, you consent to the use of ALL the cookies. Read moreOKCOOKIE SETTINGSREFUSE
Cookies Policy
Privacy overview
This website uses cookies to improve your experience while browsing the website. Of these cookies, cookies that are categorized as necessary are stored on your browser as they are essential for the basic functionality of the website to work. We also use cookies to third parties that help us analyze and understand how you use this website. These cookies will be stored in your browser only with your consent. You also have the option to disable these cookies. But disabling some of these cookies could have an effect on your browsing experience.
These cookies are essential to allow the user to move around the site and use the requested services, such as access to protected areas of the site.
Essential cookies are first party cookies and can be permanent or temporary. We use this type of cookie to manage the registration and access phase by users. Without these cookies the user would not be able to access the requested services and our sites would not function properly.
Cookie
Duration
Description
viewed_cookie_policy
The cookie is set by the GDPR Cookie Consent plugin to store whether or not the user has consented to the use of cookies. It does not store any personal data.
_GRECAPTCHA
This cookie is set by the Google recaptcha service to identify bots to protect the website against malicious spam attacks.
__stripe_mid
Stripe sets this cookie cookie to process payments.
__stripe_sid
Stripe sets this cookie cookie to process payments.
Advertisement cookies are used to provide visitors with relevant ads and marketing campaigns. These cookies track visitors across websites and collect information to provide customized ads.
Cookie
Duration
Description
test_cookie
The test_cookie is set by doubleclick.net and is used to determine if the user's browser supports cookies.
VISITOR_INFO1_LIVE
A cookie set by YouTube to measure bandwidth that determines whether the user gets the new or old player interface.
YSC
YSC cookie is set by Youtube and is used to track the views of embedded videos on Youtube pages.
yt-remote-connected-devices
YouTube sets this cookie to store the video preferences of the user using embedded YouTube video.
yt-remote-device-id
YouTube sets this cookie to store the user's video preferences using the embedded YouTube video.
yt.innertube::nextId
This cookie, set by YouTube, records a unique ID to store data on which YouTube videos the user has seen.
yt.innertube::requests
This cookie, set by YouTube, registers a unique ID to store data on what videos from YouTube the user has seen.
Analytical cookies are used to understand how visitors interact with the website. These cookies help provide information on visitor numbers, bounce rate, traffic source, etc.
Cookie
Duration
Description
CONSENT
YouTube sets this cookie via embedded YouTube videos and records anonymous statistical data.
_ga
The _ga cookie, installed by Google Analytics, calculates visitor, session and campaign data and also tracks site usage for the site analysis report. The cookie stores information anonymously and assigns a randomly generated number to recognize unique visitors.
_gat_UA-4724697-18
A variant of the _gat cookie set by Google Analytics and Google Tag Manager to allow website owners to track visitor behavior and measure site performance. The template element in the name contains the unique identity number of the account or website it refers to.
_gcl_au
Provided by Google Tag Manager to test the advertising efficiency of websites using their services.
_gid
Installed by Google Analytics, the _gid cookie stores information about how visitors use a website, also creating an analytical report of the website's performance. Some of the data that is collected includes the number of visitors, their origin and the pages they visit. anonymously.
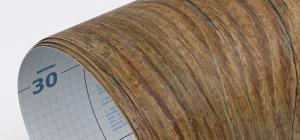 Wood Effect Vinyl Films
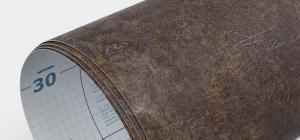 Stone Effect Vinyl Films
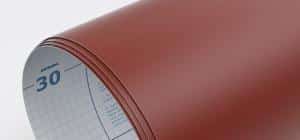 Solid Colours Vinyl Films
 Window Films
 Modern Vinyl Films
 Specials Films