Step 1. We prepare our surface
The thing to do first of all is to understand where we’re going to position our film, if the area is easy for the self-adhesive film to be applied to, for instance a door of a wardrobe, a table or a door. It will be necessary to remove all the removable parts, such as handles, hinges, knobs etc .. then we will have to figure out what state our surface is in. If the surface is in a good enough condition simply clean it with water and a little soap in order to remove any powder. If the surface needs plastering or painting because it is very old, you will need to oversee the work of filling and sanding with fine sandpaper so the surface becomes smooth and flawless. At the end of this work, the important thing is to remember to always clean before starting the application.
Step 2. The work area
Our workstation for optimum results must be spacious enough to allow movement of the material to be coated and must be free of dust. The optimum temperature for the application is between 10 ° C to 30 ° C. The ground on which we will work will have to be quite large and stable. In addition, our suggestion is to not try to finish as soon as possible, but to have enough time to devote attention to the work. All you need now is just keep calm.
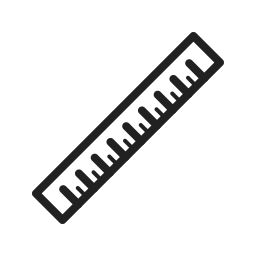
Step 3. Measuring and Cutting

Take the measurements of the self-adhesive film as well as area measurements to which we will apply our self-adhesive film . After that we’re going to cut it to the required length self-adhesive film , while maintaining at least 2 / 4cm in abundance on all sides so you can have a margin of error during application . The extent is also calculated the possible implication of edges or corners .
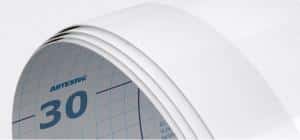
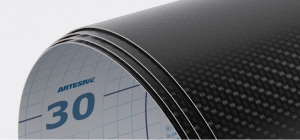
During cutting you can be aided by the convenient grid on the back . All Artesive self-adhesive films have a grid that allows you to cut to the desired size with precision and ease
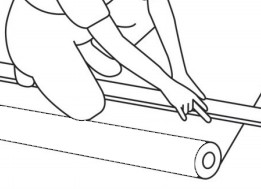
Step 4. We begin the application

First we determine the right position on the surface of our sheet of plastic, without removing the back plate and fix the end face with small pieces of paper tape, two on the bottom and two on the central sides. This will prevent the self-adhesive film from moving, and will maintain the correct position even during the early stages of application.
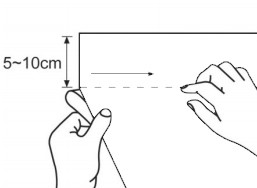
As the figure shows, starting from the side without paper tape, cast the back paper for about 5/10 cm and apply it on top of the surface. We press the surface with our spatula gently, from the centre towards the outside in order to secure it for good. If the position is correct, you can remove the paper bands because from now on, the self-adhesive film will follow the direction set by the first 10cm just applied. If it is incorrect repeat the process again and make sure that the direction of the film is not crooked.
Step 5. The correct movements
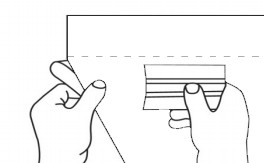
Now, slowly removing the back paper at the same time we spread the self-adhesive film with the special spatula, always starting from the top downwards, from the central part towards the outside in both directions. This movement moves the possible air bubbles to the outside of the self-adhesive film and fixes the film in an optimal way the same to the surface. The spatula should be kept at about 45 ° and the movement should be in the same direction, never making it move back and forth.
Step 6. We complete the application


We complete our application while this is setting. Remove the back paper each time for about 20 / 30cm and fix the Artesive film for the whole surface, making sure that each part is free of air bubbles. We repeat the movements with a spatula until completion. When all the back paper has been removed we press one last time with a spatula across the surface. If there are no imperfections or air bubbles we can trim the parts of excess self-adhesive film with the help of the cutter.
With regards the corners, you can decide to apply the self-adhesive film along the same or even simply remove the film and keep it only on the flat surface. This section is explained in a specific tutorials and the choice of how to act depends on your experience and personal taste.
Step 7. Remove any air bubbles

During installation, if in spite of our attention some air bubbles have still formed, do not worry.
If the bubble is large, normally it becomes noticeable during the application and you can repeat the process of fixing, removing the film and re-applying it again, making sure that the bubble comes out sideways.
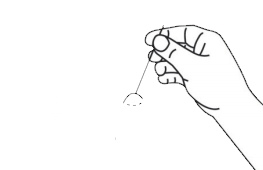
If bubbles are smaller at the end of the work we can just crack them with a small pin by venting the air with the help of the special spatula, in this case, however, pressing from the outside of the bubble towards the center of the hole, side by side very gently.
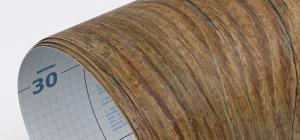 Wood Effect Vinyl Films
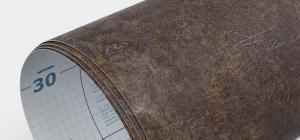 Stone Effect Vinyl Films
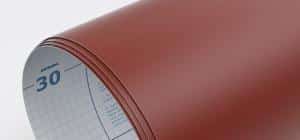 Solid Colours Vinyl Films
 Window Films
 Modern Vinyl Films
 Specials Films