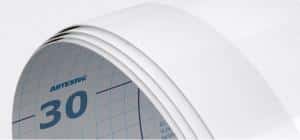
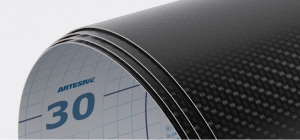
Many of our customers use our adhesive films to change the appearance of windows and doors. In this tutorial we will show the application of our film on a door from inside.
It is a complete tutorial, which covers not only the facade but also jambs and architraves. Nevertheless, of course you can get ideas for applying the film only on the facade and simplify your work.
APPLICATION PROCEDURE
Coating of door and Uprights.
LEVEL
Medium
APPLICATION TOOLS
Cleaning cloth
Cleaning brush
Meter
Cutter
Paper tape
Tools for applications
Sprayer for water
Hair dryer or heat gun
Introduction
This tutorial is divided into written parts and videos showing the process in a practical application. Normally, even those who are beginners can proceed, but we suggest looking at the tutorial and if necessary to get help from someone. The application time is about 2 hours depending on the experience of those who apply .
Usually those who decide to put the film on a door only need to apply the film on the front regardless of edges, corners or pillars. In this case however we have deliberately created a tutorial that shows every stage, from removal of the uprights until the repositioning at the end, for those who truly want to transform the door completely.
Step 1. Surface preparation and film
The first thing to do is remove the door, remove the trims and side posts, door, jambs, and casings. Remove the hardware: lock, handles and hinges. It is important to move to an area large enough not to hinder the processing steps, and work on a surface that is stable and secure.
Clean all the parts to be coated, eliminating any defects on the surfaces. If the door is really marked or dented it is a good idea to fill and smooth dents, cracks or holes, because if the door is not perfectly smooth this can affect the final result.
Measure the length and width of the parts to be coated being careful to always leave at least 5cm on each side of the edge. In addition to the uprights, in the center is a slit for the rubber gasket, remember to cut two film strips: one for each side of the mast. This will facilitate the application and once rearranged the seal will not be noticable.
After cutting any part of the film we are ready to proceed with the first phase of application.
Step 2. Application on the jambs
After preparing all suitable and clean surfaces start with the application on the jambs. Each post usually has a rubber seal and it is good to use this intermediate point to divide into two film strips to apply. Doing this means the film strip will be at the point where you enter the seal and you will not notice any cuts at the end of work.
Remember to remove the uprights and then will be divided into 3 parts: 2 side and one top.
We start the application from the outer side of one half of the upright and one proceeds all along the edge. Do not worry if you are not perfectly aligned because then the outside will be covered for about 5 / 6mm from the architrave.
As the video shows one of the most important parts is mounting along the outside edge, trying to adhere the film completely and remove all air bubbles. Use the special spatula, and slightly moisten the surface to more easily move the air bubbles to the outside.
Always allow at least 3/4 cm per side (length) of the outer margin so as to “close” the upper and lower parts of the uprights and also prevent accidental detachment.
After applying both the top and along the inside edge, you will have to cut the film just inside the slot dedicated to the seal. Do not worry if you cut flush because once mounted seal defects will not be noticable.
Follow the video and complete the application in all 3 pillars. When finished re-insert the original seal or replace it with a new one to match the new colour.
At this point you can reassemble the frame or leave the mount until the door is ready.
Step 3. Application on ports
We start our application on the door itself. With the same system already used for the struts we start from a side of the door following the direction from top to bottom. Leave some cm margins from the top, and apply the first 3 or 4cm being careful to maintain a good online film. To do this ask a second person or fix the lower end with masking tape to hold it in the right place and avoid going out of line.
Once you have attached the first area of film you can remove the paper tape as the film will follow the direction given by the first part already applied.
Use the spatula and fix step by step the film always starting from the center to the outside and remove any air bubbles. You can also moisten the surface first.
For holding the roll, follow the video which clearly shows the correct procedure.
After application on the flat part you will have to proceed on the edges just like you did with the uprights. Keep a slight tension on the edge, slightly warm the adhesive coating and fastened with the spatula. Movements that must be done slowly, starting from the centre and going towards the two outer ends.
Cut edges and corners along the inside edge with a margin of about 2 mm as shown in the video. You can use the spatula as a guide. Then apply the film on the opposite side, you will have an “overlap” along the inside edge which will avoid the cut and on each side of the film covering any defects of the overlying film. It seems a complex operation but is not, and in this step the video definitely helps.
Once applied on one half of the door and the upper and lower edges are finished, you will need to replicate the same process on the opposite.
Remember not to cut along the part which is inserted in the lock and apply only small holes where you will screw the hinges and handle.
Follow the advice of the video for these steps.
Step 4. Reassembly
Once the application is complete you can reassemble. You can also decide whether to hold the wire covers or not. Replace handle and lock, insert the hinges and reassemble.
To take advantage of promotions and exclusive offers! By subscribing you agree to our Terms, Privacy & Cookies Policy.
We use cookies on our website to give you the most relevant experience by remembering your preferences and repeat visits. By clicking “Accept”, you consent to the use of ALL the cookies. Read moreOKCOOKIE SETTINGSREFUSE
Cookies Policy
Privacy overview
This website uses cookies to improve your experience while browsing the website. Of these cookies, cookies that are categorized as necessary are stored on your browser as they are essential for the basic functionality of the website to work. We also use cookies to third parties that help us analyze and understand how you use this website. These cookies will be stored in your browser only with your consent. You also have the option to disable these cookies. But disabling some of these cookies could have an effect on your browsing experience.
These cookies are essential to allow the user to move around the site and use the requested services, such as access to protected areas of the site.
Essential cookies are first party cookies and can be permanent or temporary. We use this type of cookie to manage the registration and access phase by users. Without these cookies the user would not be able to access the requested services and our sites would not function properly.
Cookie
Duration
Description
viewed_cookie_policy
The cookie is set by the GDPR Cookie Consent plugin to store whether or not the user has consented to the use of cookies. It does not store any personal data.
_GRECAPTCHA
This cookie is set by the Google recaptcha service to identify bots to protect the website against malicious spam attacks.
__stripe_mid
Stripe sets this cookie cookie to process payments.
__stripe_sid
Stripe sets this cookie cookie to process payments.
Advertisement cookies are used to provide visitors with relevant ads and marketing campaigns. These cookies track visitors across websites and collect information to provide customized ads.
Cookie
Duration
Description
test_cookie
The test_cookie is set by doubleclick.net and is used to determine if the user's browser supports cookies.
VISITOR_INFO1_LIVE
A cookie set by YouTube to measure bandwidth that determines whether the user gets the new or old player interface.
YSC
YSC cookie is set by Youtube and is used to track the views of embedded videos on Youtube pages.
yt-remote-connected-devices
YouTube sets this cookie to store the video preferences of the user using embedded YouTube video.
yt-remote-device-id
YouTube sets this cookie to store the user's video preferences using the embedded YouTube video.
yt.innertube::nextId
This cookie, set by YouTube, records a unique ID to store data on which YouTube videos the user has seen.
yt.innertube::requests
This cookie, set by YouTube, registers a unique ID to store data on what videos from YouTube the user has seen.
Analytical cookies are used to understand how visitors interact with the website. These cookies help provide information on visitor numbers, bounce rate, traffic source, etc.
Cookie
Duration
Description
CONSENT
YouTube sets this cookie via embedded YouTube videos and records anonymous statistical data.
_ga
The _ga cookie, installed by Google Analytics, calculates visitor, session and campaign data and also tracks site usage for the site analysis report. The cookie stores information anonymously and assigns a randomly generated number to recognize unique visitors.
_gat_UA-4724697-18
A variant of the _gat cookie set by Google Analytics and Google Tag Manager to allow website owners to track visitor behavior and measure site performance. The template element in the name contains the unique identity number of the account or website it refers to.
_gcl_au
Provided by Google Tag Manager to test the advertising efficiency of websites using their services.
_gid
Installed by Google Analytics, the _gid cookie stores information about how visitors use a website, also creating an analytical report of the website's performance. Some of the data that is collected includes the number of visitors, their origin and the pages they visit. anonymously.
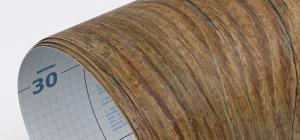 Wood Effect Vinyl Films
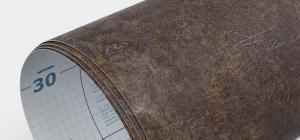 Stone Effect Vinyl Films
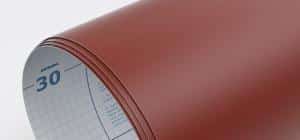 Solid Colours Vinyl Films
 Window Films
 Modern Vinyl Films
 Specials Films